Installation
What you need
| Requirement | |
|---|---|
| Python | 3.11 – 3.14, with Add python.exe to PATH ticked during the install |
| PostgreSQL | version 14+; on Linux install the postgresXX-contrib package too |
| Git (optional) | only needed for autoupdate straight from the development branch |
| DCS | a client or dedicated-server installation, with write permission for the bot |
Do not expose the bot
The installation directory holds tokens and passwords, and none of the bot's ports belong on the internet. If PostgreSQL runs on another machine, keep SSL on.
1. Create the Discord bot
Only needed if you want the Discord side; a non-Discord installation skips this.
- Open https://discord.com/developers, New Application.
- Installation → uncheck User Install.
- Bot → name, icon, then Reset Token and copy it.
- Fewer than 10,000 members: enable Server Members Intent and Message Content Intent. More than that: the installer asks you for the answer instead.
- OAuth2 URL Generator → scope
bot, then these permissions: - mandatory: Send Messages, Manage Messages, Embed Links, Attach Files, Read Message History, Add Reactions
- optional: Manage Channels (status channel renamed to the player count), Ban Members (DGSA auto-ban)
- Open the generated URL and add the bot to your server.
Where the token goes
The token you copied is the bot's password. Nothing else in the installation identifies it.
- The setup tour asks for it, keeps it in memory, and writes it to
config/.secret/token.pklwhen you confirm. It is never written into a draft config file in plain text. - The command-line installer asks for it too: "Please enter your discord TOKEN".
- Doing it by hand: put it in
config/services/bot.yamlastoken:. On the first start the bot moves the value intoconfig/.secret/token.pkland strips it from the YAML. - To replace the token later, re-add the
token:line toconfig/services/bot.yamland restart — the new value overwrites the stored one. - Without it the bot stops at startup with "No Discord token found! You need to configure it in the bot.yaml file."
Warning
Never commit config/services/bot.yaml with a token in it, and never share the token. If it
leaks, Reset Token in the developer portal invalidates it immediately — you then have to
store the new one as described above.
Tip
Turn on Developer Mode in your Discord client — it lets you right-click and copy user and channel IDs, which the configuration asks for.
2. Get the code
git clone https://github.com/Special-K-s-Flightsim-Bots/DCSServerBot.git
or download the latest release ZIP and extract it. Give the bot user write permission on the folder, and on the DCS installation itself.
Tip
Install the bot in Documents/GitHub/DCSServerBot, so that it has write permission on your
Saved Games folder.
If you install it elsewhere, make sure that you have turned
Ransomware protection => Controlled Folder access off.
3. Run the setup tour
run.cmd          # Windows
./run.sh         # Linux
An unconfigured installation opens a setup tour in your browser at
http://127.0.0.1:9876/setup. The URL printed in the terminal carries a one-time
8-character code — that code is the door, so keep the terminal window to yourself.
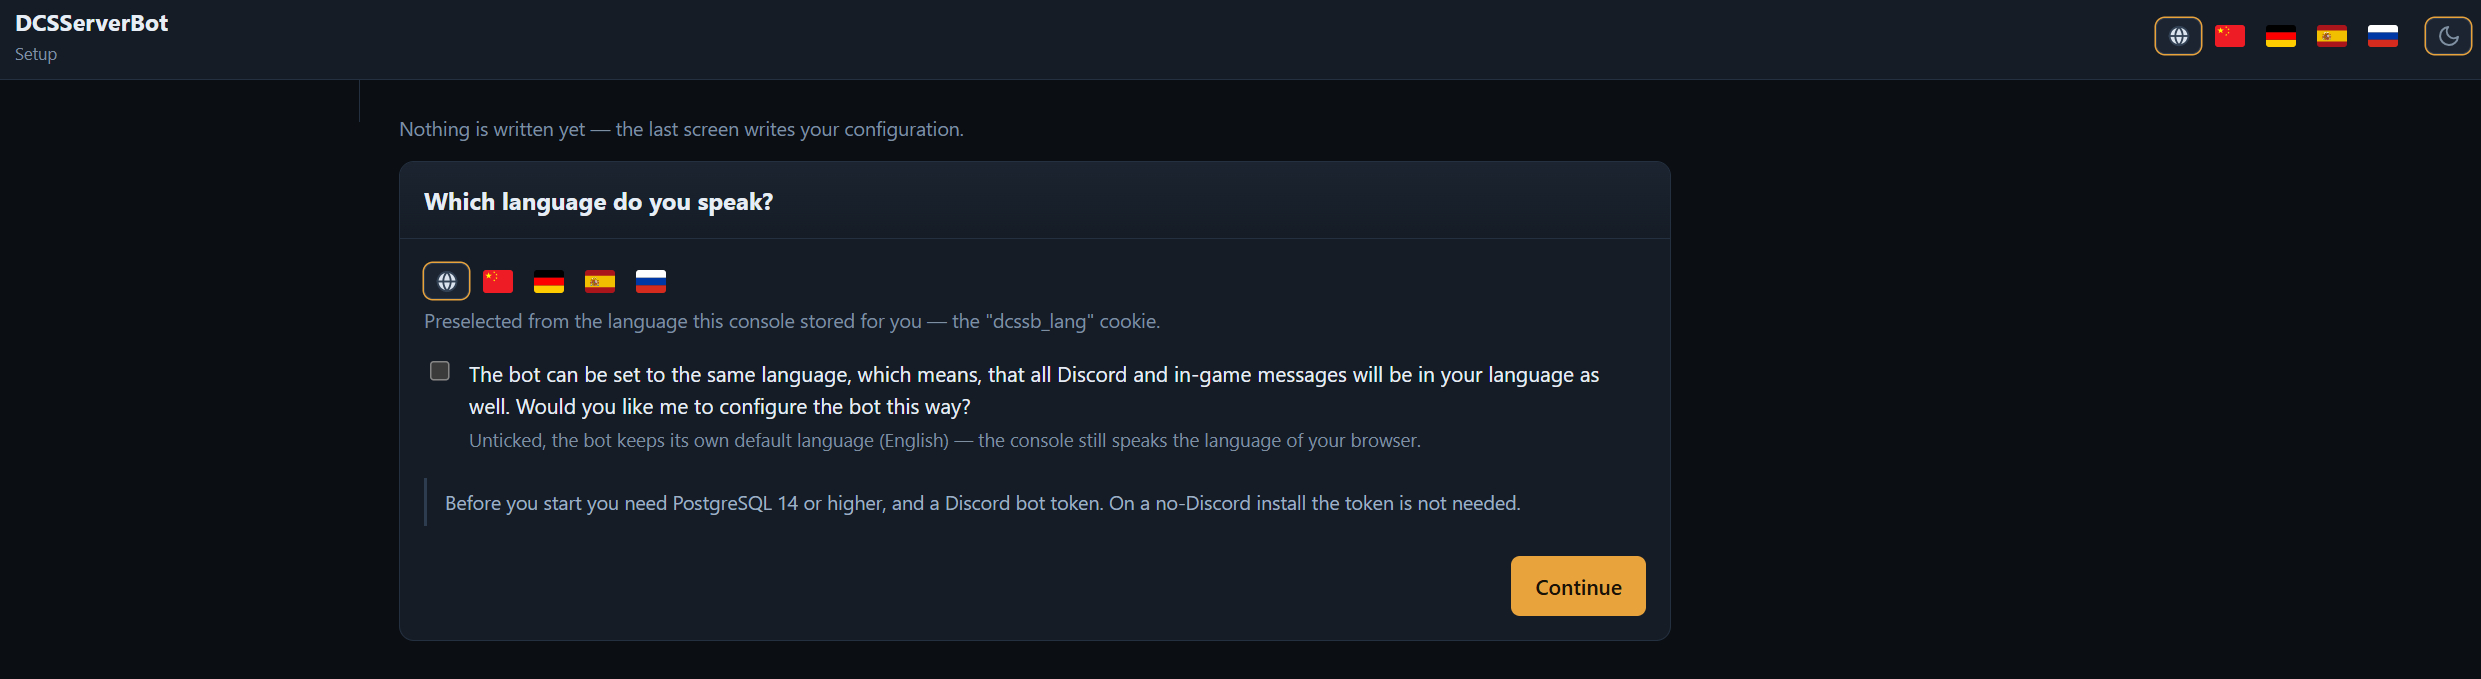
The tour asks for the Discord guild and bot user ID (or, without Discord, a group name and a role mapping by UCID), finds your DCS installations, creates the database user and database, and offers to add the servers it finds. At the end it writes the configuration files and the bot continues into its normal start.
Important
Shut your DCS servers down before installing — the installer writes to the DCS directory.
Headless and command-line variants
install.cmd / ./install.sh runs the command-line installer. run.cmd falls back to it when
there is no terminal to serve the tour from (a service, a container, redirected output).
| Option | Effect |
|---|---|
--setup |
force the web setup tour (ignored on a configured installation) |
--no-web-setup |
never start the tour, use the command-line installer |
--no-browser |
do not open a browser; the printed URL is the way in |
-n NODE |
node name, default is the hostname |
-c CONFIG |
configuration directory, default ./config |
-u USER, -d DATABASE |
database user and name, both default dcsserverbot |
Renaming a node later is the same command: run install again with --node and pick rename.
4. Check the desanitization
DCSServerBot desanitizes Scripts\MissionScripting.lua in your DCS installation, because the
mission environment needs io and lfs. If you already desanitize by another route, the bot
checks what is still missing and adds only that.
Your file should look like this after the first successful start:
do
    sanitizeModule('os')
    --sanitizeModule('io')
    --sanitizeModule('lfs')
    --_G['require'] = nil
    _G['loadlib'] = nil
    --_G['package'] = nil
end
A custom MissionScripting.lua — for LotAtc, MOOSE, OverlordBot, DCS-gRPC — goes into the bot's
config directory and replaces the default one.
5. Start it
run.cmd          # Windows
./run.sh         # Linux
The bot connects to Discord, loads its plugins and starts the servers in your configuration. Next: configuration.